


.avif)

%20(1).png)


.png)


%20(1).png)
November 26, 2019
Enhancing Digital Twins Part 2: Setting up Azure Databricks for Predictive Maintenance
In this post, we will elaborate upon Azure Databricks, and explain how we set it up to prepare for Predictive Maintenance of our digital twin’s corresponding real-life assets.
This is the second post in a 4-part series about displaying Predictive Maintenance insights in Digital Twins.
In part 1 of this series, we introduced the concept of Predictive Maintenance in Digital Twins and discussed the tools we used to make predictions.
Read Part 1: Harnessing data and Predictive Maintenance to enhance Digital Twins.
What is Azure Databricks?
Azure Databricks is an Apache Spark based cloud service, available as part of Microsoft Azure’s Platform. It was created in collaboration with Microsoft and Apache Spark and aims to ease collaboration between business analysts, data scientists/engineers on an integrated Azure platform. Azure Databricks, just like Apache Spark, is capable of machine learning, graph processing and fast treatment of big data because of its distributed computing framework. Azure Databricks is therefore ideal for conducting Predictive Maintenance on our warehouse equipment assets in the cloud.
Data source
We need to have legacy data to make warehouse equipment asset failure predictions. We could have taken the time to record IoT readings from warehouse equipment assets, but for the purposes of this trial, we’ve adapted a Predictive Maintenance dataset we had on hand to represent our legacy data.
The original dataset contained the columns ‘team’ and ‘provider’, which we replaced with 'branch' and 'machine' respectively, keeping with the warehouse asset scenario.
We also changed all mentions of ‘team’ to ‘branch’ in each row, added an id column and assigned a different machine to what used to be 'providers', from 1 through 4:
- Provider1: Forklift
- Provider2: Cooling Unit
- Provider3: Aircon Unit
- Provider4: L.B.Door Motor
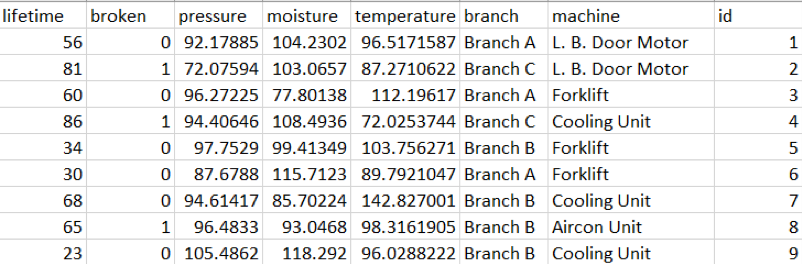
You can download our modified dataset.
Although our Predictive Maintenance dataset isn’t big enough to require Databricks, we thought it would be worthwhile to investigate Databricks anyways, for future applications.
Azure Databricks set up – and troubleshooting errors
In order to start on Azure Databricks, you first have to create an Azure Databricks resource through the Azure portal. When we first attempted to create it, however, we got the following error:
"This subscription is not registered to use the namespace ‘Microsoft.Databricks’. See https://aka.ms/rps-not-found for how to register subscriptions. (Code: MissingSubscriptionRegistration)"
This error indicated we needed to register Microsoft.Databricks under ‘Resource providers’ in our Azure Portal subscription group and once we did, it successfully created the resource.
If you run into other problems, we found this resource useful in detailing solutions for common issues.
Once created, you should be able to launch the Databricks web portal from the ‘Overview’ tab in the Azure Databricks workspace in Azure portal.
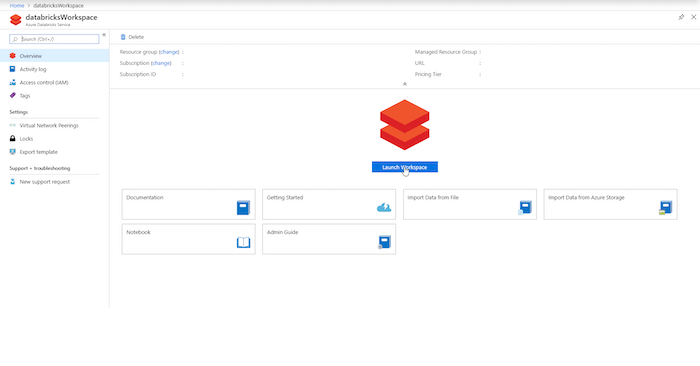
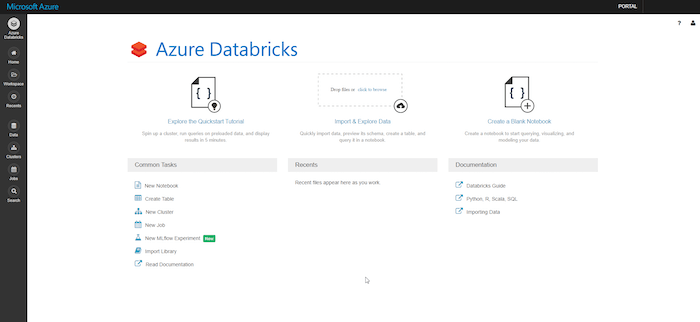
You will be prompted to sign in using Azure’s Active Directory. Once you are signed in, you should be greeted by this.
Azure Databricks cluster set up
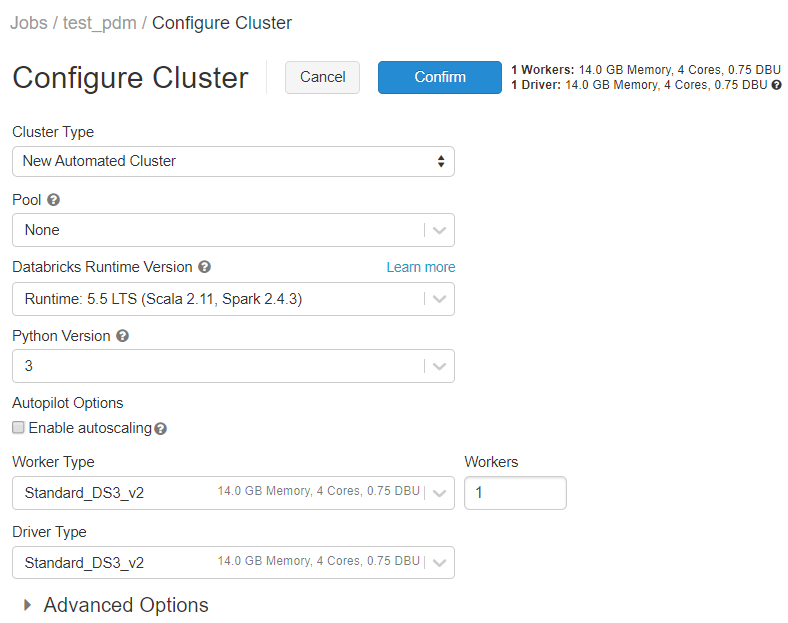
Before we create a notebook, we will have to first create a cluster from the ‘Clusters’ tab in the Databricks web portal. A cluster is needed to host and process the tasks Databricks is capable of.

Here is how we chose to configure ours:
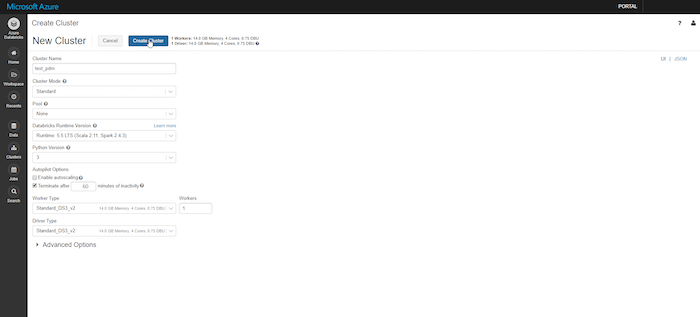
Of the two cluster modes to choose from, ‘Standard’ was ideal for us as it’s only meant for a handful of users and it supports Python and R, among other languages. ‘High Concurrency’ was too robust for us as we didn’t need to accommodate multiple concurrent users. For a similar reason, we chose not to auto-scale workers based on workload.
We also chose to halve the amount of time to wait before terminating an idle cluster as leaving a cluster inactive, but on, can be costly.
The other configurations were general suggestions by Databricks.
So far, we’ve walked you through creating a cluster through the UI view but you can switch to the JSON view at the top right and paste in the code below to match our configurations.
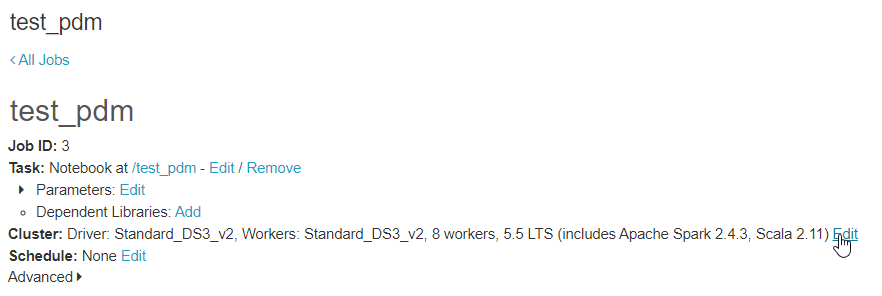
Once you’ve configured the cluster, you can create it. You will notice the cluster is initially created as an ‘Interactive’ cluster.

Please note that the cluster will start itself up on creation and it’s not uncommon for this to take some time. The 'State' column will indicate if its ‘Running’ or ‘Pending’. We will keep it running for the next few steps.

Clusters are segregated into 2 types, interactive or automated clusters; the difference being automated clusters are fast and can be self-triggered periodically while interactive clusters are more suited for collaborative analyses. As we didn’t require constant reanalysis of our data, we choose to keep it as an interactive cluster. You can change your cluster type through the ‘Jobs’ tab where jobs can be assigned to an ‘Automated’ cluster. A job is simply a scheduled run of a Databricks notebook or JAR (Java Archive file).
Azure Databricks notebook set up
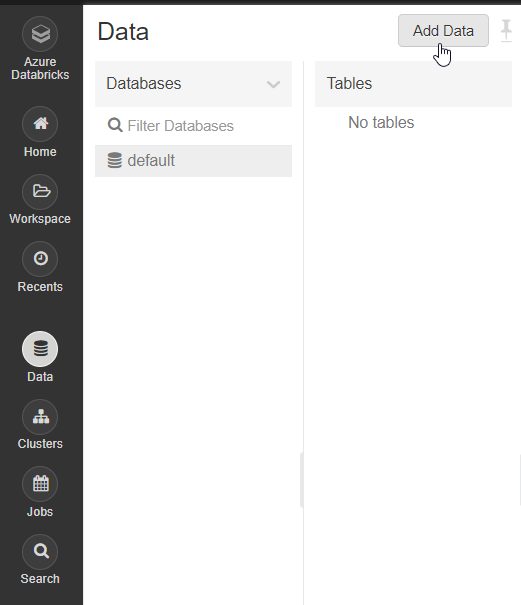
You will also have to upload a dataset to analyze within your notebook. This can be done in the ‘Data’ tab in the Databricks web portal. The dataset has to be associated with the cluster you are currently running. You will not be able to add a new dataset without a running cluster. First, navigate to ‘Add Data’.
If your dataset is less than 5TB, either upload a file using ‘Upload File’ or create your own table within Databricks using ‘Other Data Sources’ or ‘DBFS’. If your dataset exceeds 5TB, you will have to upload it to a distributed FileStore like Hadoop. We chose to upload our Predictive Maintenance dataset ‘maintenancedata.csv’, and it saved to ‘/FileStore/tables/ maintenancedata.csv’. Keep a note of where your dataset was saved, as we will use its path to read from it.
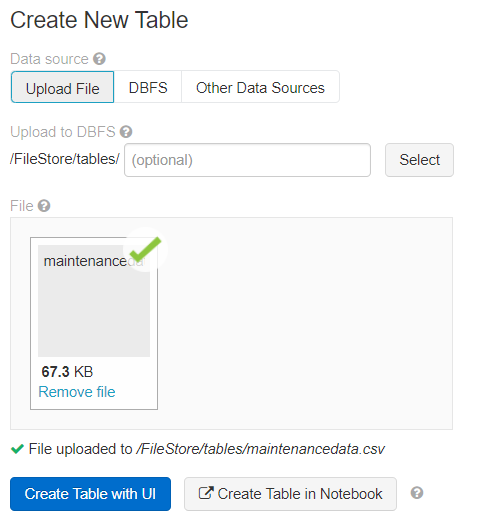
You also have the option of further editing your dataset in the Databricks’ UI or notebook. We chose not to.
Finally, you can create your notebook through the ‘Workspace’ tab. You can either create a globally accessible notebook or within a ‘Users’ scope, which will require you to set ‘Permissions’ to enable access to others. We created a global notebook, setting the primary language to R as our analyses will be done in R. Setting a primary language won’t constrain you from using other languages within your notebook so don’t be too concerned about which one you choose.

The cluster you created for the notebook must be running for the notebook to run. We recommend terminating clusters if you don’t need them.
With your notebook all set up, you are ready to start analysing your Predictive Maintenance dataset in Azure Databricks.
We found setting up an Azure Databricks resource straightforward, although navigating the Azure Databricks web portal can be a little touch and go. However, we suspect this shouldn’t pose too much of a problem once you become more familiar with the UI.
In our next post, we will detail at length the R analyses we conducted on our dataset within Databricks to produce a Predictive Maintenance report we can use in our digital twin.
Related Posts
%20(1).png)
November 27, 2019
Enhancing Digital Twins Part 3: Predictive Maintenance with Azure Databricks
In this post, we will detail the R analyses we conducted on our Predictive Maintenance dataset from post 2 to help our digital twin projects make more informed maintenance suggestions.
%20(1).png)
November 27, 2019
Enhancing Digital Twins Part 4: Writing Databricks' Predictive Maintenance Results to Blob
In this post, we will detail how we committed our results from part 3 to Azure Blob Storage so it's accessible to our Digital Twins project.
%20(1).png)
November 25, 2019
Enhancing Digital Twins Part 1: Harnessing Data and Predictive Maintenance to Enhance Digital Twins
Part 1 of a 4-part series about displaying Predictive Maintenance insights in Digital Twins, using Azure Databricks. Before we get into the setup details, we’ll introduce the concept of Predictive Maintenance and the tools we used to make predictions.