


.jpg)

.jpg)

.png)


.png)


%20(1).png)
July 15, 2019
Exploring digital twins Part 3: Raspberry Pi and Azure IoT Hub connection using Python
This is part three in a series of blog posts about some recent Innovation Lab work on Internet of Things (IoT), digital twinning, and the 3D visualisation of IoT device sensor data in Mixiply, Theta’s augmented reality (AR) platform. Extending from part one, this post will demonstrate sending telemetry from a Raspberry Pi IoT device to Azure’s IoT Hub, using Python.
Getting things ready – preparing to send simulated Raspberry Pi telemetry to an Azure IoT Hub
Before you can start to send telemetry to an Azure IoT Hub from your device, there are several things to keep note of.
The current version of Microsoft’s Azure IoT SDK (Software Development Kit) for Python is a wrapper over Microsoft’s Azure IoT SDK, generated using the Boost library. Thus, for the SDK and PIP (Python’s Package Manager) package to work, Boost and other C dependencies must be installed on the system. For the best results, Boost should be >= 1.58.
There are several Python configurations proven to work with the PIP package (expect to run into ImportErrors should you decide to deviate from these):
- Ubuntu 16:04 + Python 3.5 (or 2.7) + libboost-python-dev + libcurl4-openssl-dev + python3-dev (or python-dev for 2.7)
- Windows 10: Python 3.6 corresponding to your CPU architecture (the default download on python.org is x86 and will not work if running on x64)
- Raspbian Stretch: + Python 3.5 or 2.7 + libboost-python-dev + libcurl4-openssl-dev + python3-dev (or python-dev for 2.7)
- Mac OS: Python 3.7.0 (or 2.7) + libboost-1.67 + curl 7.61.1 (all installed via homebrew)
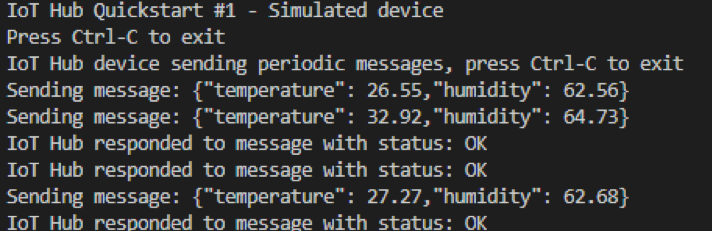
First, we ran a simulation of an IoT device on our local desktop to test if we could make connections to our IoT Hub. Since we were working with Windows 10, we made sure to be working with Python 3.6 by creating a dedicated pythonenv. Within the pythonenv, you have to install the required client SDK using PIP; without this, you can’t hope to communicate with Azure IoT Hub.
We can use the Python script SimulatedDevice.py, documented by Microsoft, to simulate an IoT device in action.
You will need to edit this to successfully start sending data to your Hub.
Open SimulatedDevice.py in your editor of choice, making sure that you are well within the correct pythonenv with Python 3.6 - we used Visual Studio Code.
Within SimulatedDevice.py, we have to add the appropriate CONNECTION_STRING for the IoT Device to authenticate the device with your IoT Hub. Retrieve this from the device in your Hub under the IoT devices tab.
We are also making use of Azure IoT Hub’s new message routing capabilities. This allows us to route messages to different resources depending on the properties we’ve attached to the simulated device. We’ve routed our SimulatedDevice to a resource using the Routing Query level = “signalr”.
With that done, you are finally ready to start sending to the IoT Hub, according to most documentation you will find online. But we encountered following errors and so did many others.
Termination of the Python Script indicated this error:
This clue eventually led us to discover that Microsoft no longer uses the MQTT protocol, instead, they currently use the MQTT_WS protocol, extended from MQTT. This has to be changed within SimulatedDevice.py’s PROTOCOL.
With that done, you should be able to successfully start sending to the IoT Hub.
Send Raspberry Pi telemetry to an Azure IoT Hub
Now that we’ve ensured that our IoT Hub connection has been properly set up, we can start sending telemetry data from a physical IoT device.
Since we were working with a Raspberry Pi, we followed the configurations suggested by Microsoft for Raspbian Stretch.
We then installed azure-iothub-device-client within Python 3.5 using PIP. We do not encourage the use of virtual environments within Raspberry Pi. After much trial and error, we were unable to install the necessary packages suggested by Microsoft into the virtual environment, with the exception of azure-iothub-device-client. To our best knowledge, this might just be infeasible, currently.
We created a directory where our Python Scripts would be kept and added our revised SimulatedDevice.py into it, at this point, we renamed the file to pi_device.py as the device is no longer a simulation.
Then in the Raspbian Stretch terminal, we ran pi_device.py with python3, which then started sending our Pi’s telemetry data to our IoT Hub.
We found working with the Raspberry Pi difficult at times - there are many intricacies. From the compatibility of installations, down to the protocols required, the Pi makes what seems like a simple task much more convoluted than it needs to be. The lack of up to date documentation for the Pi also isn’t it its favour. However, it is worth noting that the Python script for sending to Azure IoT Hub is very easy to understand and maintain and an easy way to get started with IoT.
Find out more...
In our next post we lay down all the details needed to combine the work from part 1-3 with digital twins, with the help of Mixiply, Theta’s augmented reality (AR) platform.
You can also take a look at our interview with iStart: Are digital twins coming of age?
Related Posts
.png)
July 1, 2019
Exploring digital twins part 1: Azure DevKit and IoT Hub
This is the first in a series of tech blog posts about some recent Innovation Lab work on Internet of Things (IoT), digital twinning, and the 3D visualisation of IoT device sensor data in Mixiply, Theta’s augmented reality (AR) platform.
%20(1).png)
July 8, 2019
Exploring digital twins part 2: IoT Hub, Azure Functions and SignalR
This is the second in a series of tech blog posts by Rose McColl and Lillian Ho, about some recent Innovation Lab work on Internet of Things (IoT), digital twinning, and the 3D visualisation of IoT device sensor data in Mixiply, Theta’s augmented reality (AR) platform.
%20(1).png)
July 30, 2019
Exploring digital twins part 4: AR/VR Digital Twinning with SignalR and Mixiply
This is the final post in a series of by Rose McColl and Lillian Ho, about some recent Innovation Lab work on Internet of Things (IoT), digital twinning, and the 3D visualisation of IoT device sensor data in Mixiply, Theta’s augmented reality (AR) platform.